
Our household appliances work hard to make our lives easier, but we often forget to give them the care they need. From the refrigerator that keeps our food fresh to the oven that bakes our meals, it’s crucial to regularly maintain our appliances in order to keep them running efficiently, and to preserve and extend their life cycle. In this guide, we’ll delve into the importance of proper maintenance and provide you with valuable tips and techniques to keep each home appliance in excellent working condition.

REFRIGERATOR
Regularly cleaning your refrigerator is crucial to ensure food safety and enhance its performance, with a deep clean recommended every three to four months. However, if your refrigerator has a water or ice dispenser, it’s advisable to deep clean it every two months to prevent mold growth.

Materials needed:
– Clean water
– Baking soda
– Rags or dishcloths
– Sponge
– White vinegar
– Dish soap
– Stainless steel cleaner (if applicable)
– Vacuum
Cleaning Your Refrigerator’s Interior
1. Begin by unplugging the refrigerator.
2. Empty the fridge, checking the expiry date of all items, and dispose of anything that’s no longer usable.
3. Remove shelves, drawers, and racks, and wash them using a gentle dish soap, warm water, and a soft sponge or dishcloth. Wipe dry with towels.
4. To get rid of spills, stains, and odours, mix white vinegar, baking soda, dish soap, and water, and apply this solution to the interior of your refrigerator. To avoid damaging the surface and releasing harmful toxins, avoid harsh chemicals and bleach.
5. Wipe down all surfaces with a clean, damp cloth. To eliminate stubborn stains, create a paste using baking soda and water. Scrub the paste on the stain until it comes off. To disinfect the interior of the refrigerator, make a spray of one part white vinegar to two parts hot water in a spray bottle. Apply the mixture liberally, then use a dry dishcloth to wipe it clean.
6. Once all surfaces are clean and dry, reassemble the shelves, drawers, and racks, and refill the fridge.
Cleaning Your Refrigerator’s Interior
1. Clean the exterior of your refrigerator using a damp cloth and mild cleaner or soapy warm water. If you have a stainless steel fridge, use a stainless steel cleaner to remove any smudges or grime. Be sure to clean the top of your refrigerator as it collects dust.
2. Use a damp cloth and warm water to wipe down the rubber gasket or seal that frames the interior of your fridge door. This will help to remove any debris, crumbs, mold, or mildew. Avoid using vinegar or bleach as they can damage the gasket and affect your fridge’s cooling efficiency.
3. Before turning the fridge back on, clean the coils located at the back of your refrigerator using a powerful vacuum with a hose attachment. Vacuum the coils and the grate at the bottom of the fridge to eliminate dust and debris.
4. To maintain a clean and hygienic environment, clean the floor around, under, and behind the fridge, removing any bits of food, dirt, or dust.
5. If your fridge has a built-in dispenser for water and ice, you can also clean the water line. To do so:
– Disconnect the water line and ice maker line.
– Drain any water inside the lines.
– Fill the water and ice maker lines with white vinegar and let it sit for at least 30 minutes. Tape the lines upright to the back of your fridge and turn on the ice machine to cycle the vinegar through.
– After 30 minutes, pour out the vinegar, rinse the lines with water, and change the water filter.
– Reconnect the water line and turn on the dispenser and power. Run the water dispenser several times to remove any remaining vinegar from the lines. Discard the first few batches of ice.
To keep your refrigerator in optimal condition, remember these tips:
– Improve the cooling efficiency of your refrigerator by vacuuming the coils every few months.
– Be vigilant in checking for spills, odours, or the growth of mold, and increase the frequency of cleaning as necessary.
– Dispose of expired items on a regular basis by keeping track of their expiration dates.
– Eliminate odours by placing an open box of baking soda in the fridge to absorb them.
– Ensure cooling efficiency and keep your food fresh longer by rotating items as they approach their expiration dates.
– Prevent any dripping by placing paper towels under containers to catch any spills.

OVEN
Maintaining a clean oven is crucial for a well-functioning kitchen. While regular wipe-downs can remove surface dirt, a thorough cleaning every 2 to 3 months is necessary to tackle tough stains and grease buildup.
Routine Oven Cleaning
1. Take off the burner grates, knobs, and control panels.
2. Clean the grates by soaking them in warm, soapy water or using a non-abrasive cleaner. Gently scrub with a sponge or brush and rinse thoroughly.
3. Create a thin paste with 3 tablespoons of water and ½ cup of baking soda. Spread the paste throughout the empty oven, paying extra attention to stubborn stains. Let it sit for anywhere from 20 minutes to overnight, depending on the level of dirt. To remove the paste, spray white vinegar or lemon juice and wipe with a damp cloth. Use a plastic scraper for any stubborn spots.
4. Use a mixture of warm water and dish detergent to clean the cooktop surface. Wipe away spills and stains, and for tougher stains, use a specialized cleaner suitable for your type of stove.
5. Use a soft cloth to wipe down the control panel. Avoid using excess water, as this can cause damage to the components.
6. Reassemble the stove components: allow all the parts to dry completely before putting them back onto the stove.
Self-Cleaning Oven
1. Remove the oven racks, broiler pan, grid, cookware, and any foil or liners. Use a damp cloth to clean the inside of the oven door edge and oven frame. Be careful not to move or damage the gasket.
2. Before starting the self-cleaning process, use a glass cleaner to clean the window glass. If there is any residue, gently scrub it with a very fine steel wool pad.
3. Remove any plastic items from the cooktop to prevent melting and clear out the storage drawer.
4. Initiate the self-cleaning cycle: press the designated “Clean” button on your oven’s control panel, according to your make and model. Choose the desired clean setting or cycle time. Ensure that the oven door is completely closed, as the cycle will not start otherwise. After the cycle finishes, allow the range to cool down and wipe away any remaining ashes.
To keep your oven in optimal condition, remember these tips:
– Regularly clean your oven before it gets heavily soiled to make the cleaning process easier and prevent excessive smoke.
– Ensure good ventilation in your kitchen during the self-cleaning cycle by using the range hood to remove heat, odours, and smoke.
– Avoid obstructing the oven vent(s) during the self-cleaning cycle to promote proper airflow.
– Do not clean, rub, damage, or disturb the oven door gasket, as it’s important for creating a tight seal.

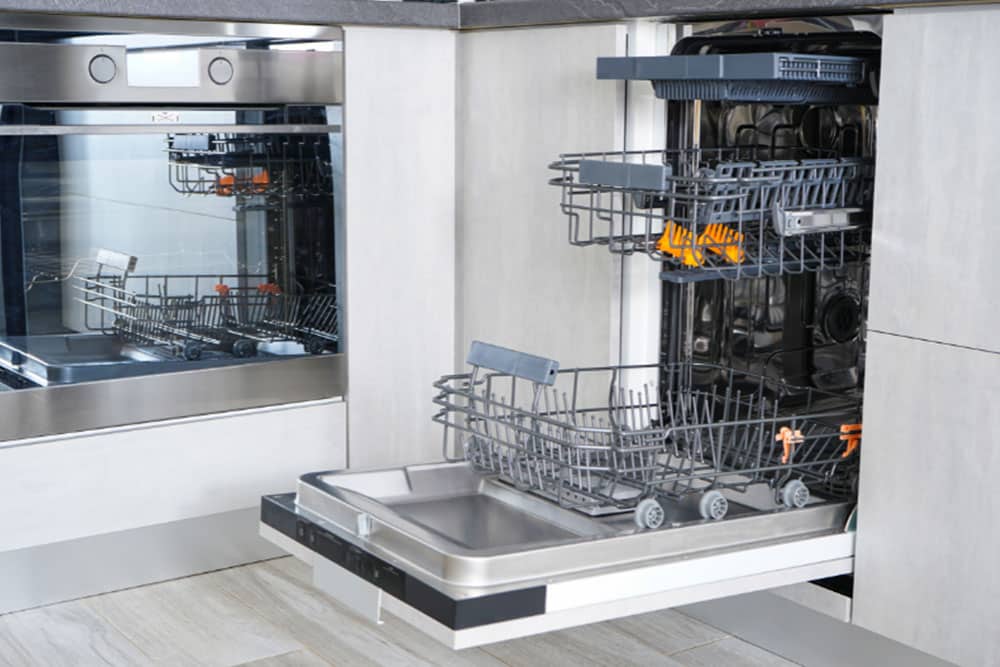
DISHWASHER
A dirty dishwasher can have negative consequences, such as dirty dishes and unsanitary conditions. It’s important to periodically deep clean the dishwasher, typically every 3-6 months. If you notice debris or residue on dishes after each cycle, more frequent cleaning may be necessary.
Materials needed:
– Warm water
– Distilled white vinegar
– Baking soda
– Toothpick or toothbrush
– Microfibre cloth
– Rubber gloves
Cleaning Your Dishwasher
1. Begin by removing the filter, utensil holders, and dishwasher racks. Prepare a mixture of warm water and one cup of white distilled vinegar in the sink. Soak these items in the mixture for at least 30 minutes.
2. While the items are soaking, thoroughly inspect the dishwasher for any hidden debris. Clean the spray arms and side walls, paying extra attention to the corners at the top and bottom. Check the dishwasher filter and dispenser, making sure to clean all the small holes and slots where water sprays out. Use a toothbrush and/or toothpick to remove any remaining scraps.
3. Take a dishwasher-safe bowl and fill it with one cup of white vinegar. Place the bowl on the bottom rack of the empty dishwasher. Select the hot water cycle to run. The vinegar will break down any residual food particles, grease, soap scum, residue, and other grime that may be present.
4. Once the first cycle is complete, remove the vinegar bowl and sprinkle one cup of baking soda along the bottom of the dishwasher. Run a short cycle. The baking soda will help remove any stains and freshen up the dishwasher.
5. Finally, clean the dishwasher door using a cleaner that’s specially formulated for your dishwasher’s surface or create a homemade cleaner using dish soap, water, and white vinegar. Wipe the door with a microfibre cloth to achieve a smudge-free finish.
To maintain optimal dishwasher performance, remember these additional tips:
– Properly load the dishwasher to ensure good hygiene between washes.
– If your dishwasher has a self-cleaning sanitize cycle, it’s recommended to run it on a monthly basis. Additionally, periodically run an empty dishwasher with a specialized cleaner to remove any built-up residue.
– Check the temperature settings on your dishwasher and make sure it’s set between 120°-150°F. If the water temperature falls below 120°, it won’t effectively clean your dishes. Use a thermometer to check the temperature and adjust your water heater accordingly.
– Use a rinse aid to prevent water spots and improve drying.
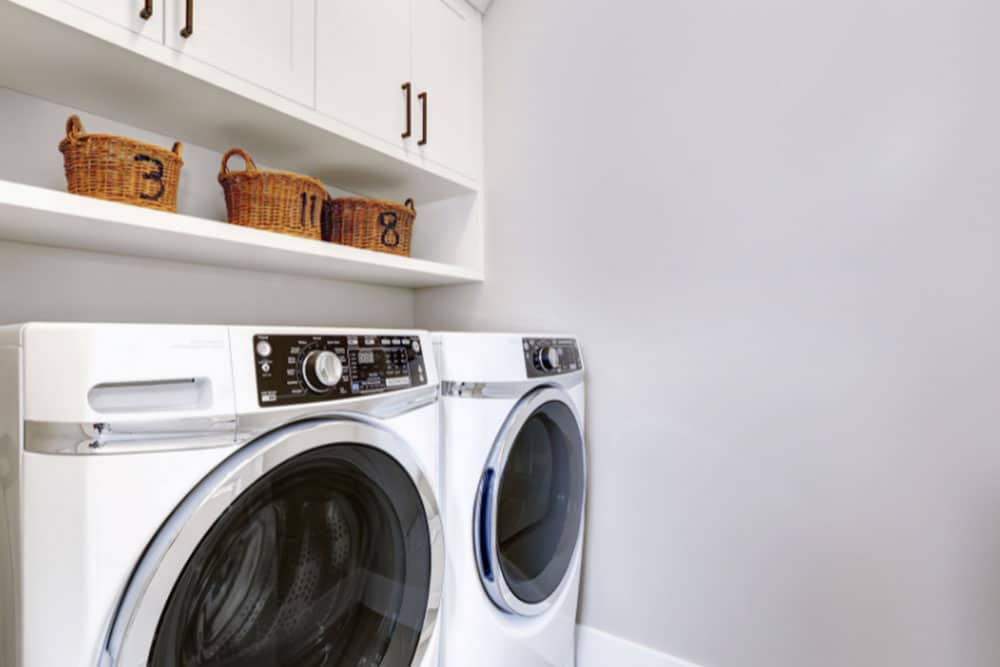
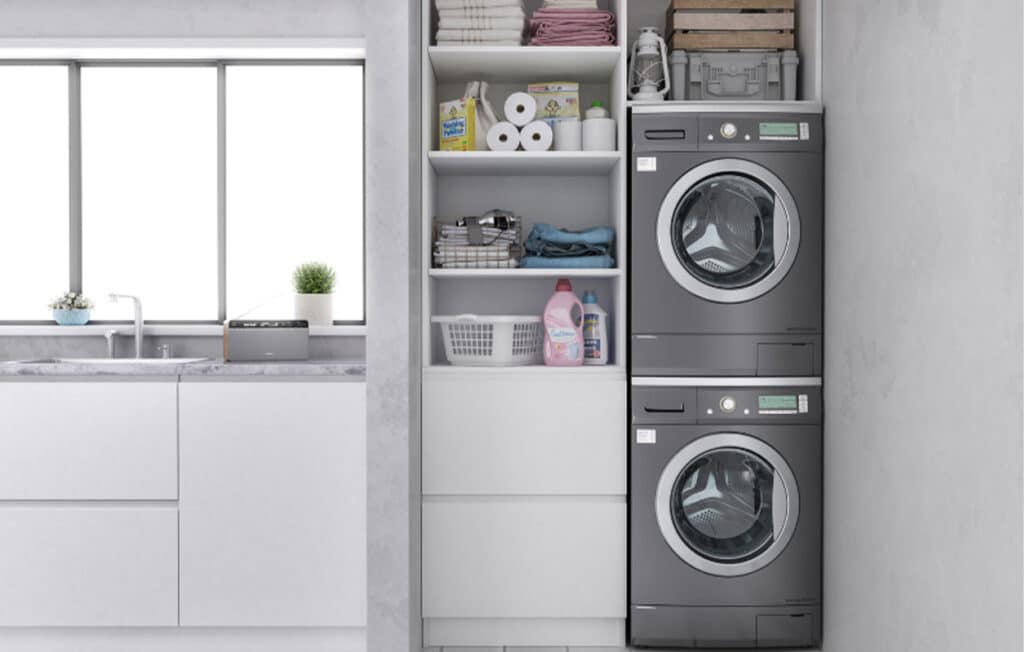
WASHING MACHINE
Over time, soap scum, mold, and dirt can build up inside your washing machine, affecting its performance and leaving your freshly-washed laundry less than fresh. It’s important to clean your washing machine every 1-3 months.
Materials needed:
– Bleach
– Peroxide
– Vinegar
– Baking soda
– Borax
– Cleaner tablets
– Toothbrush
– Cloth or rags
– Microfibre cloth
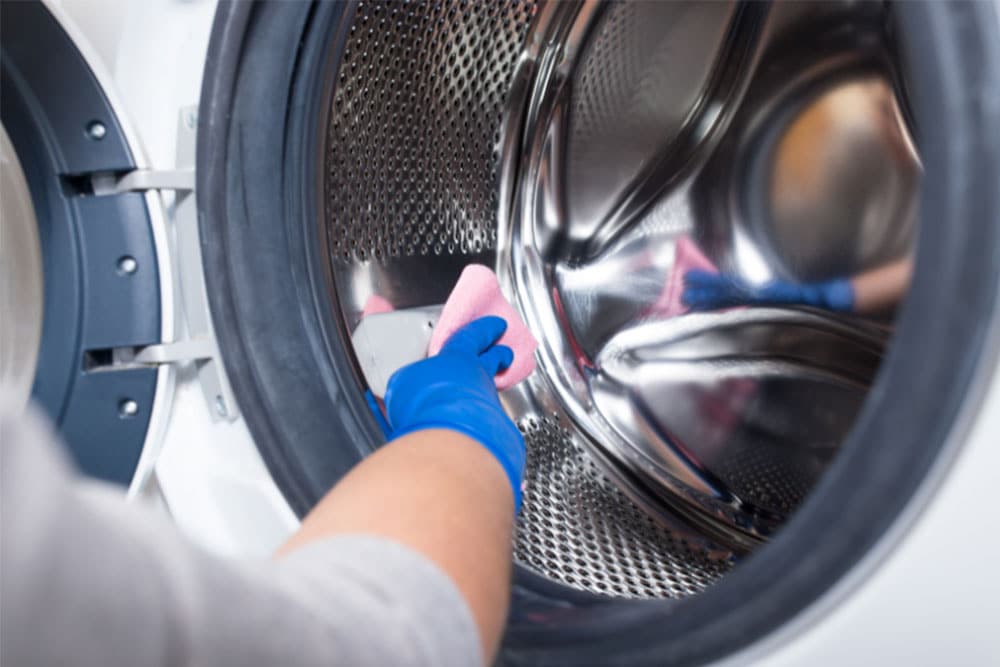
Cleaning Your Washing Machine
There are several methods to apply when cleaning your washing machine, including using bleach, peroxide, Borax, or vinegar and baking soda. However, it’s essential to avoid mixing these cleaning agents, particularly vinegar and bleach. It’s also important to note that once you choose a cleaning method, it’s important to stick to it throughout the process.
To clean your washing machine:
1. Unplug the appliance from the wall socket.
2. Clean the washing machine tub as directed below, and simultaneously soak the detergent trays, drawers, surfaces, and other removable parts in warm water. Scrub away any grime or residue with a microfibre cloth or toothbrush. Rinse all parts well, dry them thoroughly, and replace any damaged or rusted parts.
3. Use a microfibre cloth to wipe the top and sides of the washing machine, removing any dust, dirt, and lint.
4. Once the washer cycle ends, scrub the door gasket with an old toothbrush, then wipe it down with either vinegar or bleach (do not use both!).
5. Consult the owner’s manual to find out how to remove the washing machine filter. For an agitator model, use a socket wrench to loosen the bolt, then lift the agitator from the machine. Submerge the filter and agitator parts in a bucket of hot, soapy water. Alternatively, you can make your own cleaning solution using 2 cups of vinegar, 1/4 cup of baking soda, and 1/4 cup of water. Use a soft-bristled scrub brush to thoroughly clean the removed parts. Rinse well and dry with a microfibre cloth.
6. Clean the top and underside of the lid and the inside lip using a blend of water and either vinegar or bleach to eradicate mold or mildew. Scrub thoroughly with a microfibre cloth or paper towel, then rinse with water and wipe dry.
Below are the steps to follow to clean your washing machine for each cleaning method:
Bleach
1. Set your washer to a normal setting with warm water and rinse.
2. Fill the detergent compartment with ½ cup of bleach. Fill the bleach compartment all the way up.
3. Run the washer on a full cycle.
Peroxide
1. Set your washer to the highest temperature setting available.
2. Add 2 cups of hydrogen peroxide to the washing machine tub.
3. Run the washer on a full cycle.
Vinegar and Baking Soda
1. Set your washer to the largest load and highest temperature setting.
2. For a top-loader, as the washer fills with water, add 3 or 4 cups of white vinegar. For a front loader, add the vinegar and ½ cup of baking soda and run the cycle.
3. For a top-loader, allow the washer cycle to start agitating. Then, stop the cycle and let the vinegar soak for a minute.
4. Add ½ cup of baking soda, then turn on the agitator again.
5. Stop the cycle and let it soak for up to an hour.
6. Turn the washer back on to complete the cycle.
Cleaner Tablets
1. Follow the instructions provided by the manufacturer.
2. Drop one tablet of washing machine cleaner into the washer tub.
3. Run a normal cycle on the hottest water setting.
Oxygen Bleach or Borax and Washing Soda:
1. For a front-load washer, add 2 tablespoons of oxygen bleach or borax and 2 tablespoons of washing soda to the washing machine tub. For a top-loading machine, add ½ cup of each of the powders into the wash tub.
2. Run the largest cycle at the hottest temperature or use the “clean tub” setting on the washer.
3. After the cycle is complete, add vinegar to the liquid dispenser tray or washer tub. Use 2 cups for a front-loading machine or 1 quart for a top-loading machine.
4. Run another hot water wash cycle.
5. For a top-loading machine, stop the cycle after a few agitations. Let the solution sit for 30 minutes, then resume the cycle.
6. For a front-loading machine, allow the cycle to complete normally.
7. After the last wash cycle is complete, wipe the inside of the machine with a microfibre cloth to remove any residue.
To maintain optimal washing machine performance, remember these additional tips:
-Optimize performance by not overloading the washing machine, using proper detergents, and leaving the washer door open after each use to prevent mold.
-Don’t use too much detergent.
DRYER
Your dryer is an essential appliance in your home, and it’s important to keep it clean to ensure that it performs well and lasts for a long time. Over time, dirt, lint, and other debris can build up inside your dryer and reduce its efficiency. Moreover, it can become a fire hazard if not cleaned regularly. It’s recommended that you deep clean your dryer 1-2 times a year.

Materials needed:
– Soft-bristled nylon brush
– Old toothbrush or lint brush
– Sink or bucket
– Warm water
– Dish soap or liquid detergent
– Microfibre cloth
– Rag or towel
– Distilled white vinegar
– Spray bottle
– Rubberized knife, plastic spatula, or scraper
– Rubbing alcohol
– All-purpose cleaner
– Dryer cleaning brush
– Blow dryer
Cleaning Your Dryer
1. Clean the lint trap by removing it from the dryer and using your fingers or a brush to remove the lint. Soak it in warm, soapy water, then scrape off excess lint with a toothbrush. Afterwards, rinse and let it air dry.
2. Remove any lint from the dryer drum’s interior using a vacuum cleaner hose, and then use a microfibre cloth to wipe it down with a mixture of detergent, vinegar, or dish soap with water.
3. Remove stains or stuck-on items inside the dryer drum. For ink stains, run the dryer for 5-10 minutes. Then turn off the dryer, disconnect it, and wipe the stains with rubbing alcohol. Use a wet cloth to rinse. For lipstick stains, use a dry cloth to remove as much of the lipstick as possible. Then use rubbing alcohol to wipe away the remaining lipstick stain. To remove gum or candy, use a rubber knife or plastic spatula to remove as much as you can. Then, soften the residue using a blow dryer. Use an all-purpose cleaner to scrub the spot away.
4. Clean the inside of your dryer vent and duct to prevent any build-up that can hinder airflow, reduce dryer performance, and create fire hazards. To do so:
– Unplug your dryer.
– If the dryer vent is attached to the wall, unscrew the vent clamps. You should also cut off the gas supply to your gas dryer. Call an expert if you need assistance.
-Use a dryer cleaning brush to clean the lint from the vent hose and pipe. Vacuum the floor and crevices with a hose attachment.
5. Clean the exterior dryer vent following the same method used for the inside vent duct.
6. Clean the exterior of the dryer. Spray the dryer’s surface and door with a mixture of equal parts water and vinegar. Then, dampen a microfibre cloth with mild soapy water and wipe away dust and fingerprints. Be careful not to spray the knobs and buttons directly, as the water can damage them.
7. Run an empty cycle for 10 to 15 minutes to clear any remaining lint and dust from the dryer vent.
To maintain optimal dryer performance, remember these additional tips:
– Clean the lint filter after every use.
– Don’t use fabric softener sheets, as they can cause build-up on your lint screen.
– Regularly inspect vents, cords, and seals for wear and tear. Replace them when necessary to avoid electrical issues.
– Optimize the performance by not overloading the dryer.
By properly cleaning and maintaining your home’s appliances, you’ll ensure that they work optimally for years to come. To ensure you never miss home maintenance tips and tricks from us, follow us at @cachetcommunities on Instagram.